[ad_1]
This automatic liquid dispenser is based on an RFID reader and Arduino. Whenever you want to fill a water bottle or can, or petrol in a vehicle, or any other liquid for that matter, you just need to place the correct RFID card for the quantity of liquid required. The Arduino board reads the data from the RFID reader, which in turn drives the relays through ULN IC for that particular quantity.
Note: At the end of the article we have added the complete video tutorial with working.
This system helps in marriages and other functions, where you see that even after filling water from the water can, if children or anyone leaves the tap open, then the water keeps flowing and gets wasted. Water saving will increase with this project. It also provides security for the customers from various frauds that occur at petrol pumps, like short fueling of petrol by distraction, and tweaking petrol-dispensing machines using integrated chips.
List of Components Used in the Project
| Table 1: Bill of Material | |
| Components | Quantity |
| Arduino Uno (MOD1) | 1 |
| EM-18 RFID reader module (MOD2) | 1 |
| RFID tags/cards (125kHz) | 4 |
| ULN 2003 IC (IC1) | 1 |
| Water pump, 220V AC (Pump1 ) | 1 |
| Solenoid valve, 24V DC | 1 |
| 12V DC power adaptor | 1 |
| Relay, 5V DC SPST (R1, R2) | 2 |
In this proposed project, the quantity of liquid dispensed depends on the delay time for each digital output pin of the Arduino, which gets added through Arduino programming. Here we have used five different RFID tags for the different delay times required to dispense 1/2 liter, 1 liter, 1.5 liters, 2 liters, and 2.5 liters. A solenoid valve has been used for the liquid to flow without much force.
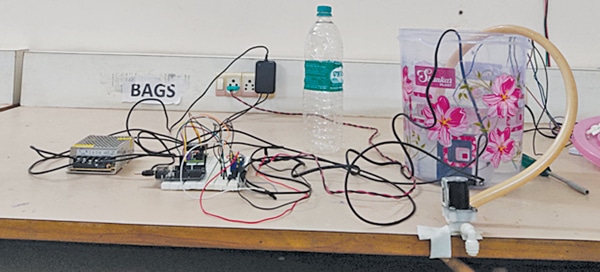
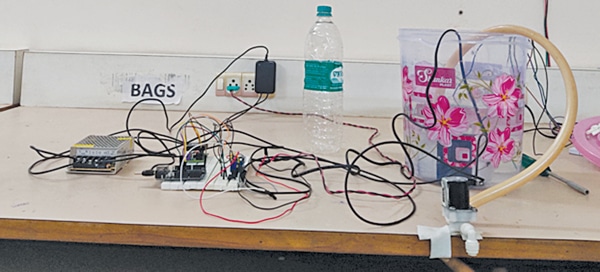
The author’s prototype is shown in Fig. 1. The components required for the project are mentioned under the Bill of Material table.
Automatic Liquid Dispenser – Coding
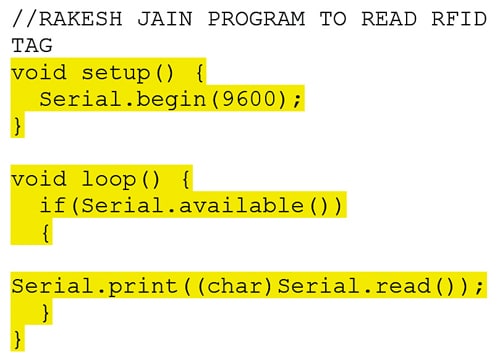
First, obtain the 12-digit unique identification number of the RFID tag on the serial monitor by uploading the source code (see Fig. 2) to the Arduino program. Before uploading, connect it to the EM-18 RFID module (MOD2), as shown in Fig. 3.

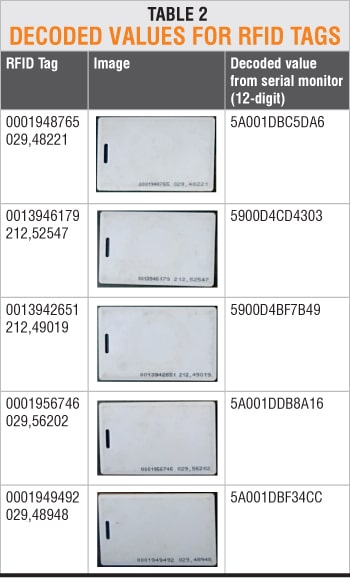
Put the RFID tag in front of the RFID reader module and see its 12-digit decoded value. The decoded values for the author’s RFID tags are shown in Table 2.
Next, prepare the code that checks the RFID card number and gives the signal to relay to dispense the liquid according to that RFID card. Here you need to change and set the card ID number according to your RFID card ID number. Fig. 4 shows a snippet of the source code.
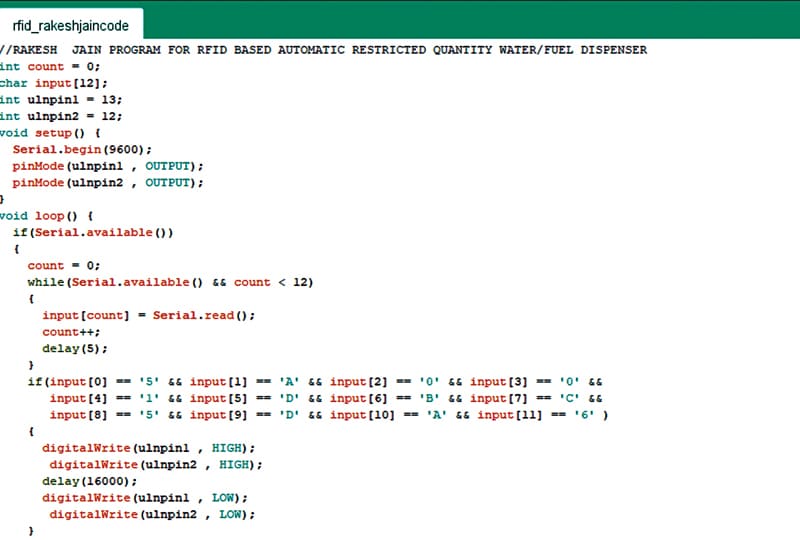
Automatic Liquid Dispenser – Circuit Connection
Connect all the components according to the circuit diagram shown in Fig. 5.
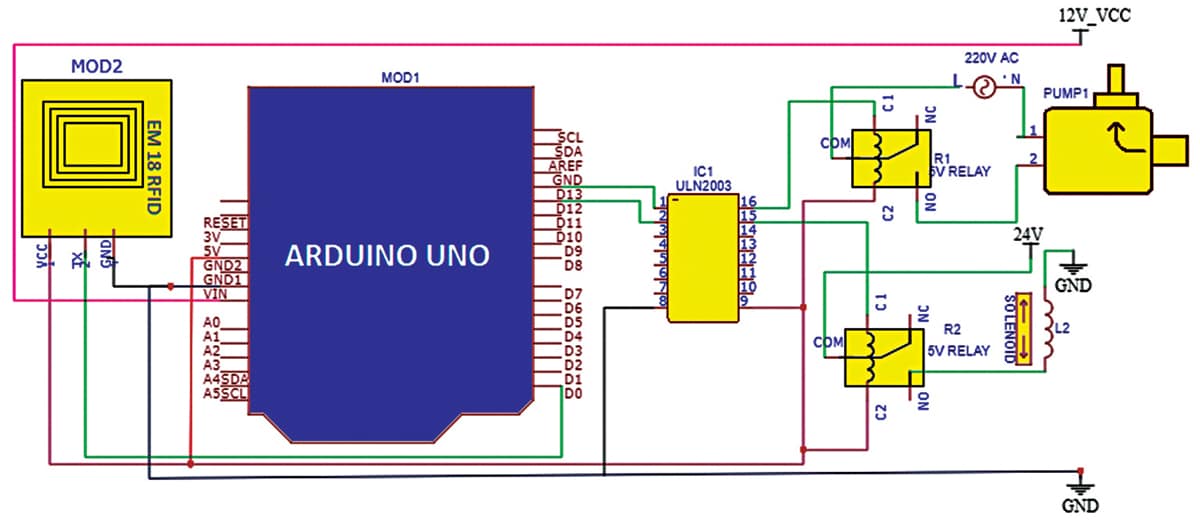
Whenever an RFID tag is put in front of the RFID reader, both relays get energized. The first relay drives the water/fuel pump motor and the second relay drives the solenoid valve. Here, ULN2003 relay driver IC is being used to drive both relays.
The circuit can fill half a liter of water/fuel in 16 seconds, and so one liter in 32 seconds, and so on, taking 80 seconds for 2.5 liters.
Must Check: Interesting Arduino Project Ideas
Video Tutorial
Download Source Code
You can also check the automatic water dispenser project that we build previously.
The author Rakesh Jain, Assistant Professor in the ECE Department of Geetanjali Institute of Technical Studies, Udaipur, has a master’s degree in VLSI and BE degree in Electronics and Communication. His research areas are sensors and microcontrollers. He has 26 copyrights and 3 Indian patents and is the recipient of the Mewar Scientist Award 2023
[ad_2]


